Before marshmallows became the fluffy, sugar-heavy treats we recognize today, they had a very different origin. The original versions were made using marshmallow root, a plant long valued for its soothing properties. What started as a medicinal confection slowly evolved into the gelatin-based marshmallows we know now—but the root of the tradition (literally) is still worth honoring.
This recipe brings marshmallows back to their roots while keeping them kid-approved, fluffy, and delicious.
The history of marshmallows
Marshmallow root (Althaea officinalis) has been used for centuries in traditional herbal practices. It’s naturally rich in mucilage—a gel-like substance that becomes slippery and soothing when mixed with liquid. Historically, this made it especially useful for calming irritated throats and supporting digestion.
Early marshmallows were made by extracting this mucilage, combining it with honey, and whipping it into a soft confection. Over time, marshmallow root was replaced with gelatin for consistency, shelf stability, and ease of production. While modern marshmallows are convenient, they lost the gentle herbal benefits that made the original versions unique.
By incorporating marshmallow root back into homemade marshmallows, we get the best of both worlds:
- the structure and fluffiness from gelatin
- the traditional, soothing qualities of marshmallow root
Why we love making marshmallows from scratch
Homemade marshmallows let you:
- control sweetness
- choose high-quality ingredients
- skip artificial dyes and preservatives
- adjust flavors naturally
They’re also surprisingly fun to make—especially with kids. Nash loved watching the mixture transform from liquid to fluffy marshmallow, and being able to taste something he helped create made it even more special.
(Below you’ll find Nash’s YouTube video so you can watch the full process step by step.)
Ingredient highlights (what we used and why)
Marshmallow root infusion
Rather than using plain water, we steeped marshmallow root to create a gentle infusion. This adds tradition and subtle herbal support without overpowering flavor.
Grass-fed gelatin
Gelatin provides the structure marshmallows need. It’s what gives them their familiar bounce and chew.
Honey from Red Hill Vegetable Farm
We used local(ish) honey from GM Red Hill Vegetable Farm in Kersey, and the flavor truly shines here. It’s warm, floral, and not overly sweet—perfect for marshmallows that don’t taste flat or cloying.
Homemade vanilla-infused sugar
For the ¼ cup of sugar in this recipe, we used our homemade vanilla-infused sugar. This adds depth and a natural vanilla aroma without needing extra flavorings. It’s a small detail that makes a big difference.
Vanilla extract
A generous splash of vanilla keeps the flavor familiar and kid-friendly, balancing the honey and subtle herbal notes.
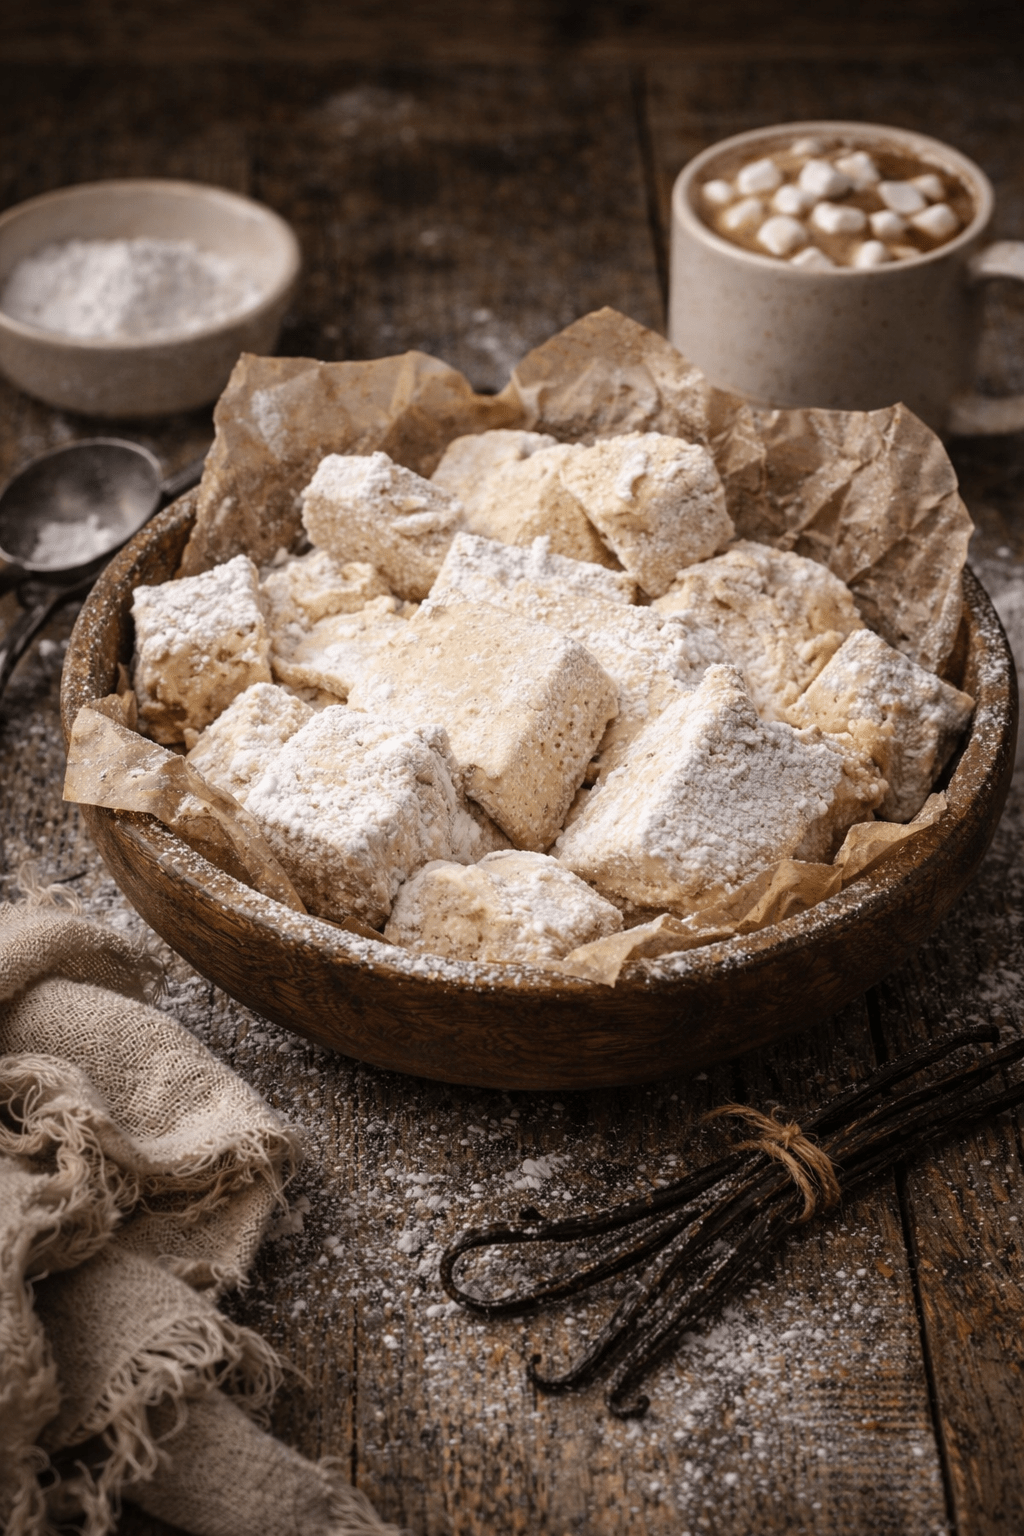
Homemade Vanilla Marshmallows with Marshmallow Root
Ingredients
Marshmallow Root Infusion
- 1 cup water
- 1–2 Tbsp dried marshmallow root
Marshmallow Base
- ½ cup cooled marshmallow root infusion
- 3 Tbsp grass-fed gelatin
- ¾ cup honey
- ¼ cup vanilla-infused sugar
- ¼ tsp fine sea salt
- 1 Tbsp vanilla extract
Dusting Powder
- ¼ cup arrowroot flour or tapioca starch
- ¼ cup powdered sugar
Instructions
- Make the marshmallow root infusion
Bring water and marshmallow root just to a gentle simmer. Cover and steep for 20–30 minutes. Strain and allow to cool to lukewarm. Measure out ½ cup. - Bloom the gelatin
Pour the cooled infusion into the bowl of a stand mixer. Sprinkle gelatin evenly over the surface and let it bloom for 5–10 minutes until spongy. - Heat the sweeteners
In a small saucepan, gently warm the honey, vanilla-infused sugar, and salt over low-medium heat, stirring until fully dissolved and smooth. Do not boil. - Whip the marshmallows
With the mixer on low, slowly pour the warm honey mixture into the bloomed gelatin. Increase speed to high and whip for 8–10 minutes until thick, fluffy, and bright white. Add vanilla extract during the last 30 seconds. - Set the marshmallows
Line an 8×8 pan with parchment and dust lightly with the dusting powder. Spread the marshmallow mixture evenly into the pan and dust the top. - Let set and cut
Allow to set for 4–6 hours (or overnight). Cut into squares and toss lightly in additional dusting powder to prevent sticking.
How we love to use them
- Floating in homemade hot cocoa
- Chopped into small cubes for kid snacks
- Gifted in jars during the winter months
They store well at room temperature for a few days or in the fridge for longer keeping.
As an Amazon Associate, I earn from qualifying purchases. This means I may earn a small commission — at no additional cost to you — if you purchase through links on this page.
These marshmallows are a beautiful example of how traditional ingredients can fit naturally into modern kitchens. They’re soft, flavorful, and familiar—yet rooted in history. Using local honey and homemade vanilla sugar makes them even more special, and involving kids in the process turns a simple treat into a meaningful memory.
Be sure to watch Nash’s YouTube video below to see the full process and how much fun this was to make together.

Leave a comment