There is something incredibly grounding about baking sourdough with freshly milled flour. From choosing your wheat berries to watching the dough transform over time, it feels equal parts science, intuition, and tradition. This recipe is written specifically for a Pullman pan and uses 100% fresh milled flour, with a blend designed for flavor, strength, and structure.
This loaf is soft, sliceable, and perfect for everyday use — sandwiches, toast, or just warm with butter. Below is my exact process, timing, and ingredient breakdown.
Below is a short video of Nash helping make this loaf from start to finish. He walks through the process in a simple, hands-on way that’s fun to watch and easy to follow.
Step 1: Feed Your Starter (The Night Before)
I like to feed my sourdough starter the night before mixing the dough so it’s fully active and ready to go in the morning.
- Feed time: Around 9:00 PM
- Feeding ratio: 1 : 2 : 2 (starter : flour : water)
- Hydration: 100% hydration starter
This ratio gives the starter plenty of food overnight and reliably puts it at peak activity by morning.
By morning, your starter should be:
- Doubled (or more)
- Bubbly and airy
- Slightly domed or just beginning to fall
If your kitchen is cooler, feeding a bit earlier in the evening can help ensure the starter is fully active by mix time.
Step 2: Wheat Berry Blend
For this loaf, I like a blend that balances flavor, nutrition, and dough strength:
- 10–15% Einkorn – Adds tenderness and a mild, nutty flavor
- Remaining 85–90% split evenly between:
- Hard Red Wheat
- Hard White Wheat
This combination gives the loaf structure from the hard wheats while keeping it from becoming overly dense thanks to the einkorn. Note: you can use this article to help you get creative with grain selection.
Mill your wheat berries fresh just before mixing the dough for the best flavor and fermentation performance.
Step 3: Ingredients
This recipe is written for a 13″ x 4″ Pullman loaf pan.
- Using the lid will give you a perfectly square, sandwich-style loaf
- Baking without the lid allows the loaf to dome naturally
I typically bake without the lid, but both options work well. All measurements are in grams for consistency and accuracy.
- 840 g fresh milled flour
- 607 g water
- 30 g extra virgin olive oil
- 34 g vital wheat gluten
- 20 g kosher salt
- 143 g active sourdough starter (fed within the last 12 hours, 100% hydration)
This timeline is created with the expectation that the dough temperature starts around 80°F and gradually cools to 70–72°F during bulk fermentation. This thermometer will help you with tracking the temperature of the dough during the fermentation process and after baking.
Step 4: Mixing the Dough (Morning)
In the morning make sure your sourdough starter has at least doubled. When your starter is ready, add all of the ingredients in a large bowl. Mix until a cohesive dough forms. This can be done by hand or with a dough hook on low speed for around 8 minutes.
The dough will feel slightly tacky but should not be overly wet. Fresh milled flour absorbs water differently than store-bought flour, so resist the urge to add extra flour early on.
Step 5: Rest & Initial Development
Once mixed, cover the dough and let it rest for 60 minutes. This rest allows the fresh milled flour to hydrate fully and helps gluten begin developing naturally. After resting, perform 2-3 gentle stretch-and-folds to smooth the dough and build strength.
Step 6: Stretch & Fold
- Keep the dough at room temperature
- Dough temperature will slowly drift from ~80°F at mixing down to 70–72°F
- Perform 2–3 sets of gentle stretch-and-folds
- Space them about 30-45 minutes apart
Fermentation Timing Options
Same-Day Bake (Most Common):
- Now it’s time to start the bulk ferment until the dough has risen about 30–50%
- This usually takes about 2 hours sometimes a little more
- Shape, proof, and bake the same day
- This is my typical approach when I want bread ready for dinner
Overnight Cold Fermentation (Optional):
- After completing the stretch & folds at room temperature, place the dough in the refrigerator overnight
- Shape and bake the next day
- Cold fermentation improves flavor and flexibility, but I don’t recommend going much longer than overnight with fresh milled flour. If you’re using store-bought flour you can go up to 3 days in the fridge. The longer you ferment the stronger the tang of the bread.
Bulk fermentation is complete when:
- The dough has risen about 30–50%
- It looks smoother and slightly domed
- It feels airy but still elastic
With fresh milled flour, fermentation moves faster than with white flour. Always watch the dough rather than relying solely on the clock.
Step 7: Shaping & Pullman Pan Prep
- Lightly oil your Pullman pan.
- Turn the dough out onto a clean surface.
- Gently shape into a log that fits the length of the pan.
- Place seam-side down into the pan.
Lightly press the dough to even it out, but avoid degassing too aggressively.
Step 8: Final Proof
Cover the pan and allow the dough to proof until the dough rises to about ¾–1 inch below the rim of the pan. This can take anywhere from 2–4 hours, depending on room temperature and starter strength. When gently pressed, the dough should slowly spring back but leave a slight indentation.
Step 9: Baking
- Preheat oven to 375°F
- I like to fill a glass dish with about 10 ounces of water and put it in the oven as it’s preheating – it helps give the loaf a little more bounce
- Also optional, but something I like to do is spritz the top of the loaf with a little olive oil to keep the crust a bit softer
- Bake for 45-50 minutes
The loaf is done when it sounds hollow when tapped and the internal temperature reaches 200–205°F.
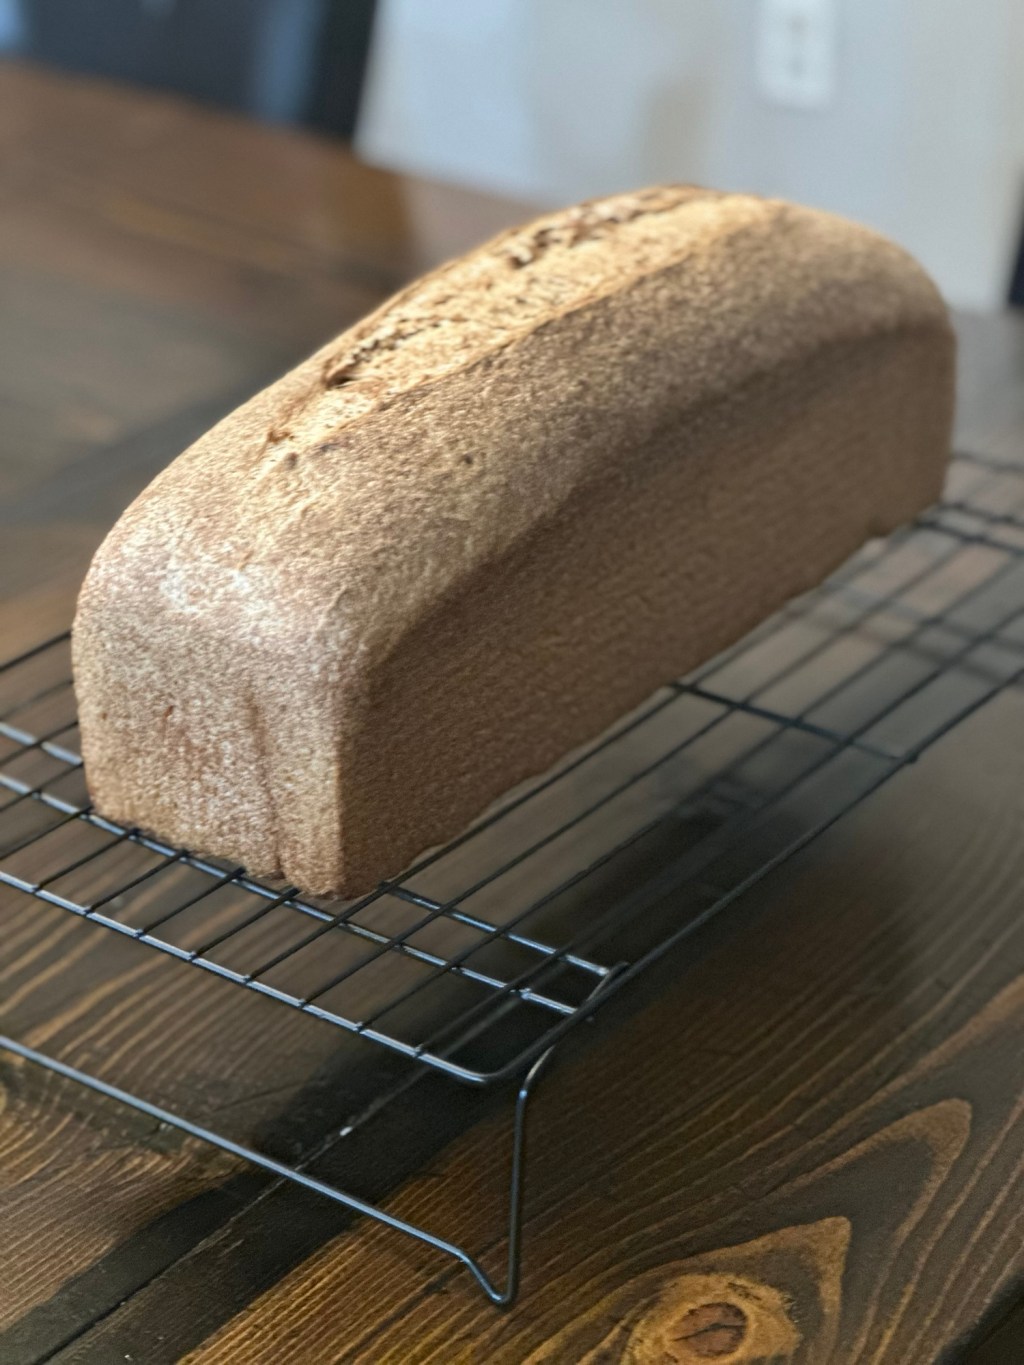
Step 10: Cooling
Remove the loaf from the pan after 5-10 minutes and allow it to cool completely on a wire rack. Fresh milled sourdough continues to set as it cools, so slicing too early can result in a gummy crumb. Letting it cool fully is worth the wait.
This sandwich loaf of fresh milled sourdough is a beautiful balance of nutrition, flavor, and practicality. The einkorn adds depth, the hard wheats provide strength, and the Pullman pan creates a perfectly shaped loaf ideal for everyday use.
Don’t forget to read this recipe so you can make butter from scratch while you wait for your dough to proof. It’s the best combination!!
If you’re new to fresh milled flour, this is a forgiving and reliable place to start — and if you’ve been milling for a while, it’s a loaf you’ll come back to again and again.
If you’re curious about milling grains, Pullman pans, or dialing in fermentation with fresh flour, those are topics I’ll be sharing more about here on the blog.

Leave a comment